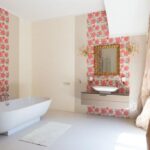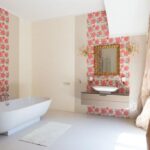
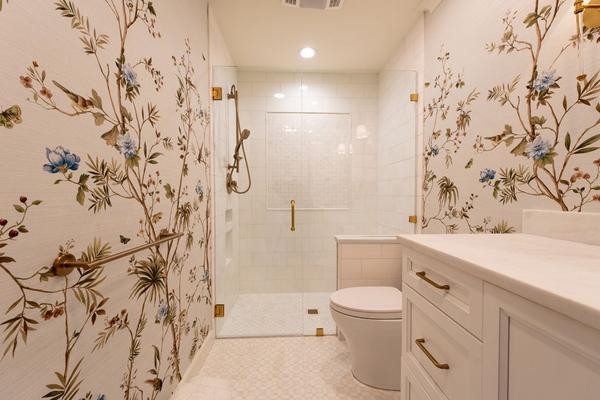
Wallpaper can make a bathroom feel warmer and more personal, but the wall beside a shower is not the same as a wall beside a wardrobe. The crucial question is where liquid water actually lands. Bathroom wallpaper around showers can work beautifully on walls that stay relatively dry; ordinary wallpaper is a poor choice where water hits repeatedly. Before choosing a pattern, map the spray, splashes and condensation in your particular bathroom.
The Simple Rule: Keep Ordinary Wallpaper Out of Direct Spray
A moisture-resistant finish can tolerate humid air and occasional light splashes, but that does not make it waterproof. Water can reach the backing through joins, cut edges and damaged areas, weakening adhesive and sometimes trapping moisture against the wall. Inside a conventional shower enclosure, use a properly specified wet-area finish, such as suitable tile, shower panels or a specialist waterproof wallcovering system. A decorative vinyl roll bought for a bathroom is not automatically suitable for shower walls.
Understand the Three Areas Around Your Shower
Direct wet zone: inside the enclosure
Walls beneath the showerhead, beside the controls and behind someone standing under the spray take repeated soaking. Treat these surfaces as wet areas even when a curtain or screen catches most of the water. Standard paper, peel-and-stick wallpaper and ordinary bathroom vinyl do not belong here. The waterproofing beneath the visible finish also matters; the decorative surface alone should never be assumed to protect the wall assembly.
Splash zone: immediately outside the opening
The shower splash zone is less predictable. Water may escape when someone opens the door, reaches for a towel or uses a handheld shower. In a family bathroom, a wall that seems dry during a quick inspection may receive regular splashes. If droplets frequently land there, choose a more robust washable wall finish or extend the shower’s wet-area protection rather than gambling on wallpaper.
Humid but generally dry zone
A wall across the room, behind a vanity away from taps, or alongside an enclosed shower may be suitable for bathroom-rated wallpaper when it stays free of direct water. Good extraction, dry sound plaster and a product approved for humid rooms still matter. Condensation collecting on a wall after every shower is a warning that the location may not be as dry as it looks.
Use Your Actual Shower to Find the Boundary
There is no universal distance in inches or centimetres that guarantees safe wallpaper placement. The answer depends on spray direction, shower pressure, the size of the room, the screen and how people use it. Before decorating, run the shower as you normally would, including the handheld head if you have one. Check nearby walls, the floor and the area outside the door for droplets. Repeat after an ordinary shower with the screen opened as usual.
For example, in a narrow bathroom with a walk-in shower, a wallpapered feature wall just beyond the glass may still catch water through the open entry. Moving the wallpaper to the wall opposite the shower can create the same visual impact with far less exposure. Think in terms of water paths, not simply distance from the shower tray.
Choose a Wallcovering for the Exposure, Not the Label
For walls outside the direct wet zone, look for a manufacturer’s explicit approval for humid bathrooms, plus installation guidance covering primer, adhesive and cleaning. Some vinyl-faced wallcoverings are washable and resist surface moisture, but their seams and backing remain potential weak points. Peel-and-stick products vary widely, and humidity may affect their adhesive.
Specialist systems do exist for water-contact areas. Unlike ordinary wallpaper, these can use reinforced fabric, dedicated primer, adhesive and protective resin layers installed as a complete waterproof assembly. For instance, Wall&decò markets a wet-area wallcovering system designed for showers. Such products require their specified installation method and should not be confused with standard water resistant wallcovering. Follow the system manufacturer’s wet-area and substrate requirements, as well as applicable local building rules.
Preparation and Edge Details Matter
A suitable dry-zone wall should be clean, smooth, sound and fully dry before installation. Investigate staining, peeling paint or recurring mould rather than covering it. Use the primer and adhesive required for the chosen product, and allow coatings to cure as directed. Avoid placing a vulnerable seam where occasional splashes strike repeatedly.
Transitions are especially important where wallpaper meets tile, shower trim or a countertop. Follow the manufacturer’s instructions for edge protection; some specify compatible sealants at particular junctions. Caulking the edges of ordinary wallpaper does not transform it into a shower lining. If a wall needs waterproofing, that must come from an approved assembly, not a last-minute bead of silicone.
Control Steam and Watch for Early Damage
Bathroom wet zones are only part of the challenge. Steam condenses on cooler surfaces, especially in poorly ventilated rooms. Run the extractor during showers and continue afterwards according to its guidance, open the door when appropriate, and repair any leaks. Wipe persistent condensation rather than letting it sit on the wallpaper.
Inspect joins and corners occasionally. Lifting edges, bubbling, discolouration or a musty smell may indicate moisture problems. Do not simply paste a loose seam back down if the wall underneath remains damp. Find the source of moisture and allow proper drying before deciding whether the covering can be repaired.
Frequently Asked Questions
Can you put wallpaper directly behind a shower?
Not ordinary bathroom wallpaper. A directly sprayed wall needs an appropriate waterproof wall assembly. A specialist decorative wet-area system may be an option if it is expressly rated for showers and professionally installed to its instructions.
Is vinyl wallpaper waterproof enough for the shower splash zone?
Usually not for frequent water contact. A washable vinyl face can resist surface moisture, but joins, edges and adhesives may fail when repeatedly soaked. Check the exact manufacturer’s rating and choose a wet-area finish wherever splashing is routine.
Will sealing wallpaper make it safe beside a shower?
A compatible protective treatment may improve cleanability or incidental splash resistance where the manufacturer permits it. It cannot reliably substitute for a designed waterproofing system in a wet zone, and an unsuitable sealer can cause its own problems.
How far from the shower should wallpaper start?
Use the real splash boundary rather than a fixed measurement. Observe normal shower use, including water escaping when the door opens. Begin wallpaper only where the wall consistently stays free from direct splashes and the chosen product is suitable for humid conditions.
Bring the Pattern In Without Inviting Water Damage
The smartest approach to bathroom wallpaper around showers is selective placement. Let durable waterproof materials handle water, and give wallpaper the drier walls where its colour and pattern can shine. If you are comparing finishes, start with bathroom wallpaper material choices, then review bathroom wall preparation and practical bathroom ventilation improvements before committing to a design. A carefully positioned feature wall usually looks better for longer than wallpaper pushed into a wet zone it was never designed to handle.