
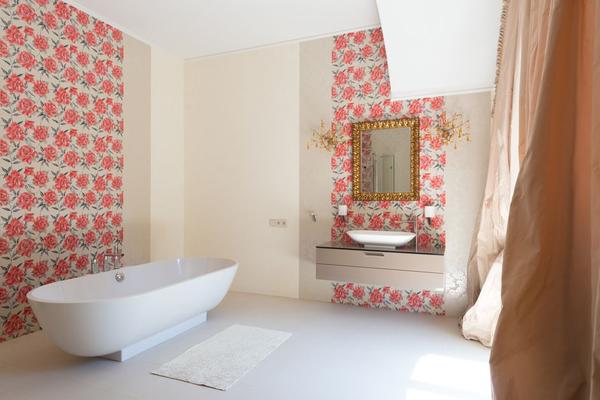
Bathroom wallpaper can look perfectly tidy from a distance while a small lifted seam near the basin is quietly collecting splashes. That is why learning how to seal wallpaper in a bathroom starts with identifying where water actually reaches the surface. A suitable clear coating can give some wallcoverings extra resistance to occasional moisture, but it cannot turn ordinary paper into shower waterproofing. The best result comes from protecting vulnerable details, choosing compatible products and keeping the room dry between uses.
Decide Whether Your Wallpaper Needs Sealing
Check the wallpaper manufacturer’s care and installation instructions. Some washable vinyl and bathroom-suitable wallcoverings already have protective surfaces. Adding another finish may be unnecessary or could affect their appearance and warranty. Traditional paper, delicate prints and textured materials can react differently to a liquid coating.
Location matters just as much. Wallpaper on a well-ventilated wall opposite the shower faces humidity and occasional condensation. Wallpaper immediately behind a basin may receive droplets every day. Inside a shower enclosure, or where bathwater regularly runs down the wall, a decorative clear wallpaper sealer is not a substitute for an approved waterproof wall system.
Keep direct splash areas tiled or protected by a suitable backsplash. Choosing bathroom wallpaper materials with their intended location in mind is safer than trying to waterproof unsuitable paper afterward.
Check the Three Places Moisture Finds a Way In
Seams between wallpaper strips
A seam that is flat and firmly bonded is less vulnerable than one with a raised lip. Recurring condensation or splashes can reach an open seam and loosen the paste beneath it. Inspect seams at eye level and lower down, where water may collect.
Cut edges beside basins and trim
Look around the vanity, along the top of a backsplash and where wallpaper meets painted trim. An exposed cut edge can absorb moisture even when the face is wipeable. Depending on the wallcovering and adjoining material, compatible finishing trim or manufacturer-approved edge treatment may offer better protection than coating the entire wall.
Cold or persistently damp patches
Water stains, bubbling, a musty smell or paper that repeatedly lifts can point to condensation, leaks or damp material behind the finish. Do not seal over these warning signs. A topcoat may hide the problem temporarily while moisture remains trapped underneath.
How to Seal Bathroom Wallpaper Step by Step
1. Identify the wallpaper and approved finish
Find the product name if possible, then confirm whether its maker allows a water-based decorator’s varnish or another protective topcoat. A clear wallpaper sealer should be explicitly suitable for that wallcovering and indoor use. Do not assume a general-purpose polyurethane varnish is safe on printed wallpaper.
2. Repair loose seams before applying anything
Where a seam has lifted but the backing and wall are dry and sound, carefully use wallpaper seam adhesive compatible with the original material. Follow the directions, remove excess from the face promptly and allow the repair to dry fully. A wallpaper edge sealer is not a replacement for adhesive: painting over a loose flap rarely restores the bond underneath.
3. Clean gently and let the surface dry
Remove dust using the cleaning method permitted by the wallpaper manufacturer. On washable vinyl, that may mean a lightly dampened cloth; fragile paper may only tolerate gentle dry dusting. Avoid soaking seams, scrubbing patterns or coating over soap residue. Wait until the wallpaper and repairs are fully dry.
4. Test an inconspicuous patch
Apply the proposed product to a spare offcut if you kept one. Otherwise, test a small, hidden area only if the manufacturer permits it. Examine the result after the full stated curing time, in daylight and under bathroom lighting. Look for darkened colors, altered sheen, bleeding ink, softened texture, patchiness and adhesive problems. A product called clear can still leave a glossy film.
5. Apply thin, even coats if approved
Protect nearby fittings and follow the sealer label for tools, ventilation, coverage, recoat intervals and drying conditions. Work carefully with a suitable brush or roller, avoiding heavy deposits at seams and edges. Apply only the specified number of coats; more is not automatically better. Never use silicone across wallpaper seams unless the manufacturer specifically instructs you to.
6. Allow full curing before normal bathroom use
Dry-to-touch and fully cured are not the same. Keep the wallpaper away from steam, splashes and cleaning for the product’s full stated curing time. Afterward, check edges and stop if you notice lifting, discoloration or tackiness.
A Basin-Side Example: Protect the Edge, Not Just the Face
Imagine a patterned wall above a vanity with a short tiled backsplash. Water from handwashing occasionally lands on the wallpaper’s lower edge. Coating the whole wall might alter the pattern’s matte finish without addressing the exposed junction. A better starting point is to check that the paper is fully bonded, confirm the backsplash diverts water and ask the wallpaper manufacturer which edge detail or protective finish is compatible.
If water regularly splashes above the backsplash, extend the hard, wipe-clean surface instead of relying on varnish. This is where planning a bathroom backsplash often does more than an extra layer of moisture protection wallpaper coating.
What a Sealer Cannot Fix
Sealing cannot repair a plumbing leak, dry damp plaster or compensate for poor ventilation. It can also change how a wallpaper breathes, which matters if water is already behind it. Where walls remain damp, correct the moisture source before repairing or replacing the finish.
Run a bathroom extractor that vents outdoors during and after showers, and use an open window when practical and safe. Wipe repeated condensation from nearby hard surfaces and check for dripping pipes. The US Environmental Protection Agency recommends removing bathroom moisture with outdoor-venting fans or suitable window ventilation. A bathroom condensation prevention guide is a useful companion to wallpaper care.
Frequently Asked Questions
Can I put a clear coat over any bathroom wallpaper?
No. Compatibility depends on the wallpaper’s surface, inks, backing and coating. Some materials are already washable, while others may stain, change sheen or lose adhesion. Check both manufacturers’ instructions and test before proceeding.
Should I seal every wallpaper seam?
Not automatically. Well-adhered seams may need no extra treatment. Repair a lifted seam with approved seam adhesive first, and use additional edge protection only where the manufacturer recommends it.
Will sealing make wallpaper safe inside a shower?
No. Standard wallpaper with a decorative clear coat is not a certified shower waterproofing system. Use wall finishes and waterproofing assemblies specifically designed for continuous direct water exposure.
How often should sealed bathroom wallpaper be checked?
Inspect high-risk seams, cut edges and areas beside the basin regularly, especially after heavy use. Look for lifting, staining, blistering and trapped moisture. Follow the coating maker’s maintenance guidance rather than resealing on an automatic schedule.
Keep the Protection Proportionate to the Risk
To seal bathroom wallpaper successfully, start with a dry, stable wall and a finish the manufacturer approves. Pay special attention to seams and splash-prone edges, test clear coats for visible changes and respect drying times. Most importantly, treat sealing as supplementary protection. Good placement, suitable wallpaper and reliable ventilation are what keep a bathroom wall looking its best.